
Adobe Lightroom- or as I like to call it, my photography magic wand, is a must have for anyone who is really ready to take photography seriously. Lightroom is editing software. It will allow you to improve your photos after you take them- such as cropping things out, saturating the color, or changing the brightness. More importantly, your photographs start to become canvases, and your computer becomes your paintbrush.
I have been using Adobe Lightroom for 6 years now. When I first downloaded it, I was worried that I would not get my money’s worth ($119). Since that day, I have used Adobe Lightroom on EVERY SINGLE picture I take– which has been thousands over the last few years! Even if my pictures looks flawless on my camera screen, Lightroom never fails to brighten the colors and really upgrade my photo.

For example, I recently took this picture of my sweet niece, Hazel. The original picture looked decent, but it needed some improvements. She had a little drool under her chin, a little rash on her chest, and those beautiful blue eyes were dulled with the rest of the colors in the image.

In lightroom, I was able to make some easy, and quick updates and upgrade the photo to this brighter, cleaner version.

Lightroom Features For Beginners
When you first open Lightroom, it may seem a little overwhelming; however, once you dive in you will see how self-explanatory it can be!

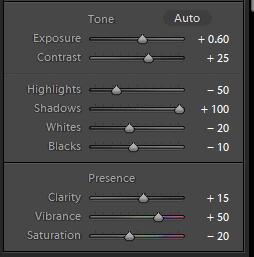
If you look to the right, you will see this box below. Here, you can adjust exposure (making the picture lighter or darker), clarity (making the image bolder), saturation (how bright the colors are), and some other features.
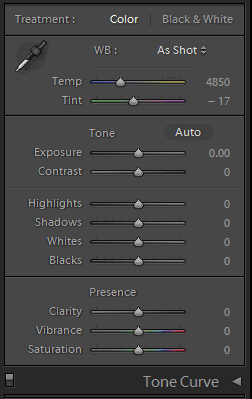
I will give you some detail on these other features, but these words won’t mean much until you start to practice and play around with the ‘sliders’ (you move to the left and right).
- Highlights and Whites- refer to the brightest areas in an image
- Shadows and blacks – refer to the darkest areas
- Saturation and vibrance- refer to the color
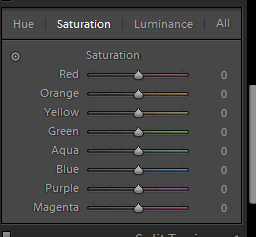
You will also see that you can adjust the overall coloring of the pictures. For example, if we are outside and the grass looks very dull, you can UP the green saturation and brighten it up.
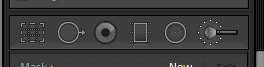
Additionally, towards the top left you will see these icons. Here you can fix red eye, use a painter brush, and crop your image.
There is a world of opportunity in Lightroom! You just have to start to practicing- but if you have come this far with photography, you know that all good things come with a little practice.
Intro to Lightroom Presets
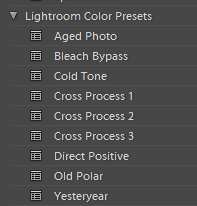
You can think of presets as Instagram filters. A Lightroom Preset is a bundle of pre-determined settings. Basically, you can edit a photo, and then save that exact combination of slider positions for future use on another image. OR, for even more fun, you can download or purchase Lightroom ‘presets’ to use!
I recommend going to a reliable source if you are going to purchase Lightroom presets. Many time, I have paid $10 or so for about 50 lightroom presets, and found that NONE of them were very good! I recently purchased a few presets from Color Story and they are beautiful! Here are a few to check out!:
Get the Color Collection as Photoshop Actions or Lightroom Presets Get Essentials | Desktop as Photoshop Actions or Lightroom PresetsOnce you download your Lightroom presets, you will need to install them into your Lightroom following these easy steps:
- Open Lightroom.
- At the top, go to: Edit – Preferences – Presets.
- Then, click on the box titled:” Show Lightroom Presets Folder”
- Double click on Lightroom.
- Then, double click on “Develop Presets”
- Copy the folder(s) of your presets into the Develop Presets folder.
- Restart Lightroom.
Once your presets are installed, you will see them to the left. If you click on a preset, it will instantly transform your settings and your photo. There is no better feeling [in lightroom] than when you find a super star preset!
Here is an original picture:

I clicked on one of these presents to the left:
Which instantly transformed all of the settings:
And gave me this new brighter portrait! Easy as pie!

Summary
Now that you are equipped with the basics – what Lightroom is, what it’s capabilities are, and how awesome presets are- you are ready to get started! I use Lightroom for 100% of my pictures, and if you are ready to UP your photography-game, then it is time you do too!
Check out my other photography related posts!
- The Best Headshot Photography Guide for New and Professional Photographers
- How to Take Pictures During the Golden Hour
- Top 5 Most Common Beginner Photography Questions Answered
- 10 Photography Posing Prompts for Natural Family Photo Sessions
- The Ultimate Guide to Everyone’s Favorite Holiday Photographs
If you found this helpful, share it!

5 Tips for Stunning Close-up Portraits - Simply Snapping Mom
Wednesday 13th of March 2019
[…] editing software, that is great for any photographer (whether hobbyist or professional). Here is an Intro to Lightroom if you would like more […]